Updated: August 04, 2020
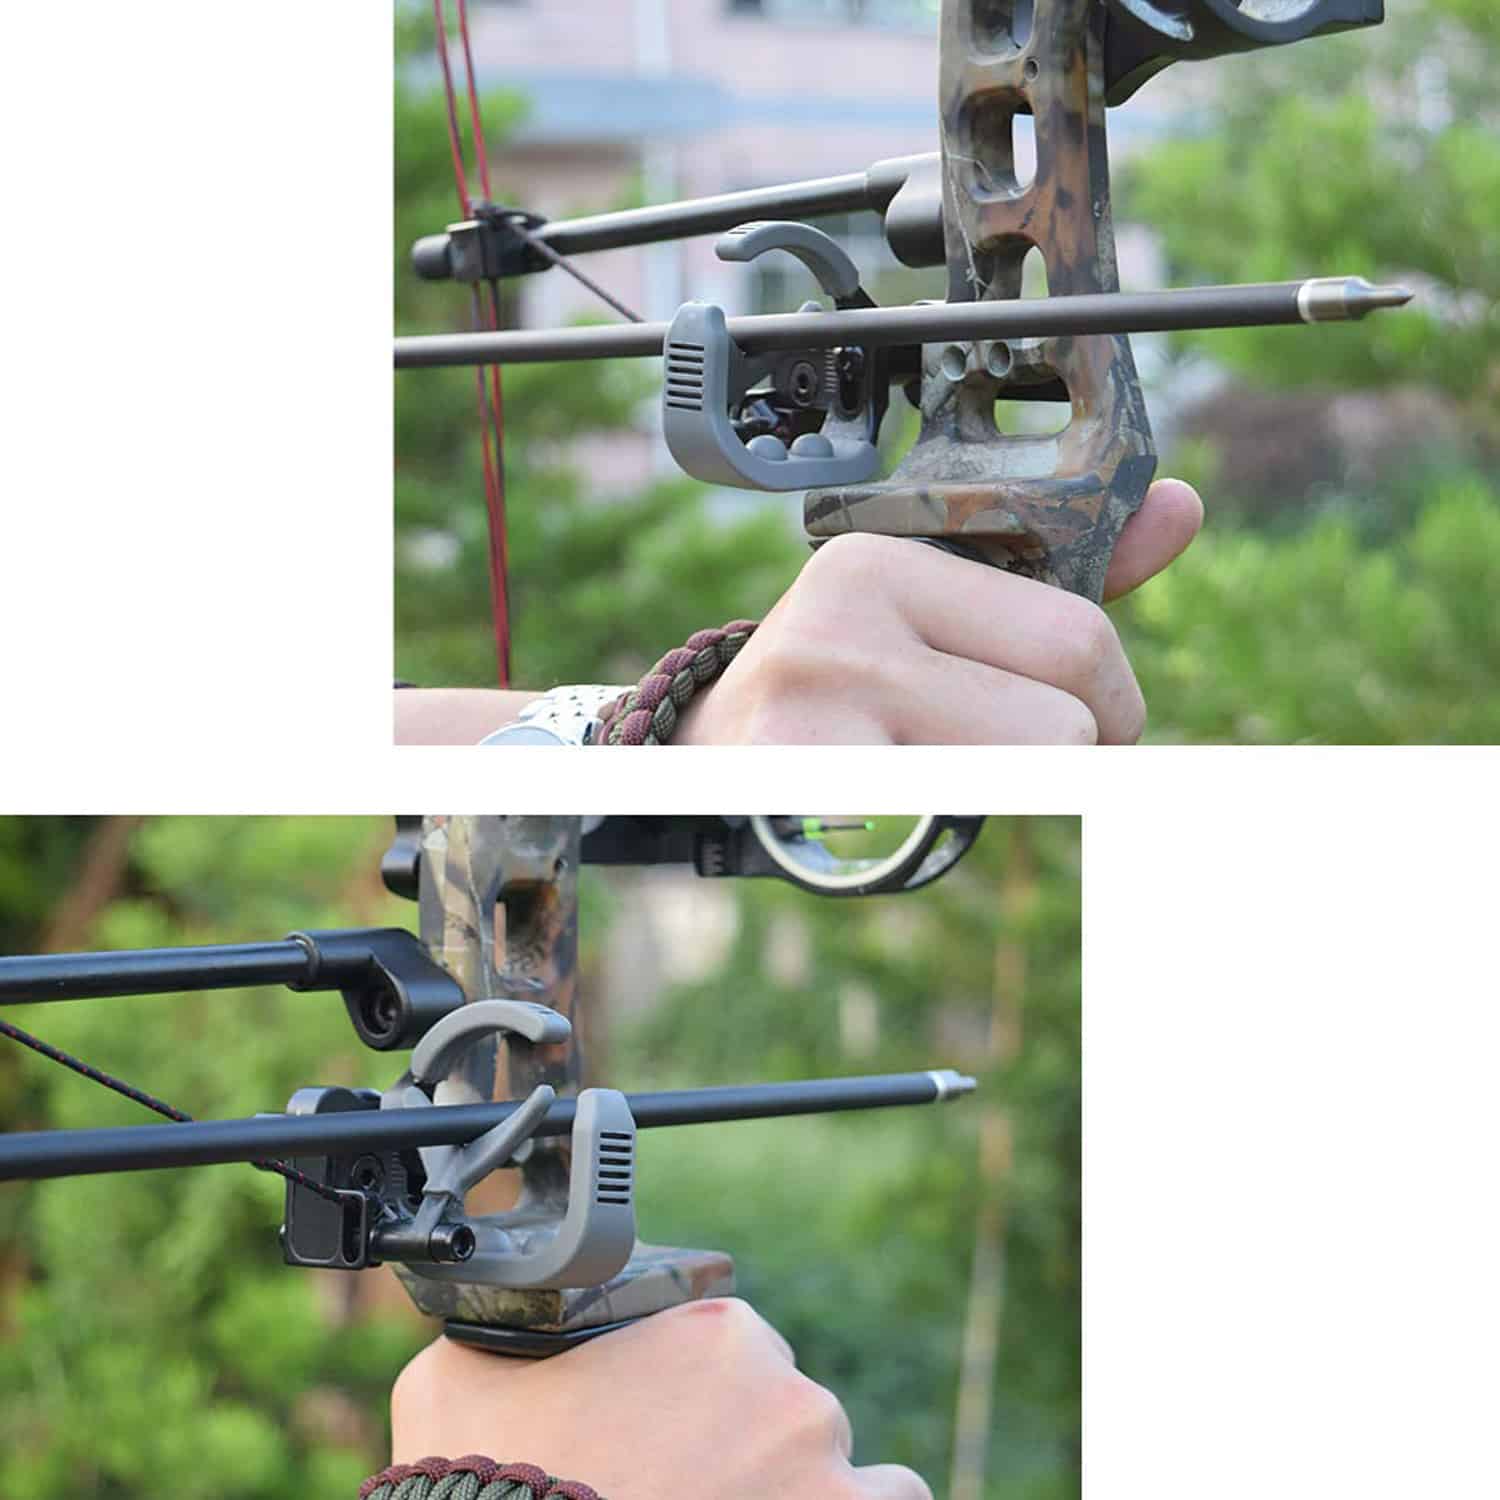
No matter how skilled you are with your bow, you may find that the use of a good drop away arrow rest could give you a whole lot better accuracy and consistency each and every time you used your weapon. It’s one of those kinds of accessories that can make a profound impact on how successful you are with your bow.If you are unfamiliar with this device, don’t be embarrassed. What you will find in many of the products that you purchase related to the hunting or archery industries is that the names often give you a very clear picture of what the accessories used for. What this particular accessory does is hold your arrow in place while you are drawing it back. When you click to release the rest actually drops so that it does not hinder your arrow as it is leaving your bow, but has been in place long enough to stabilize the arrow and create greater accuracy. Sounds like a very worthwhile invention, wouldn’t you say?
Many get concerned that using such a device will actually cause the arrow to slow down. They are concerned that the arrow will drag across the rest as it is being released, but that is not a concern at all. The purpose of this product is to simply hold the arrow in place while you are drawing your bow back.
How to install a drop away arrow rest?
In all honesty, not every drop away arrow rest is going to look the same. This means that installation may be a little different from one product to another, but this instruction should give you a pretty clear idea of how to install the vast majority of these products, and should at least assist you in getting underway no matter what choice you have made.
The foundational principle of these is that the vast majority of drop away arrow rests use string that joins the rest to the launcher arm on one side and the bow’s downlink on the other. This is not always the case, however. There are instances where one ends connects to the bow appendage. Still, you should have a good idea of how this works.
Tightening the Rest
Let’s begin with the first step. Where you want to begin is by fixing the rest to the bow’s riser. Before you do this, you want to make sure that your rest is level before fixing it in place. If it is not, then you are going to have issues, so it may take you a little bit of practice and time to get this to work properly.
To make sure that you have a strong mounting, make sure that you fix the catch had fastener and both the arrow rest in the middle piece of the ball. This piece is called the riser, and should be secured with screws. It is important to understand that you need to have the rest firmly anchored in the riser.
Measure the Drawcord
Before you append the bow’s down cable, you want to make sure that you have properly measured the drawcord. If the rope is excessively short or excessively long you can be sure that your bow is not going to work properly. Get a proper measurement or you will regret that you didn’t.
Attach the Drawcord
Your next step is to properly connect the drawcord to about an inch underneath the rest. You can do this in one of two ways. What you will find is that some makers of arrow rests incorporate to little pieces that connect to two drawcord’s as well as to the down cable. Both of the pieces are connected together using a little screw. When connected, these pieces looked very much like a football.
Your other option is to attach the attract string to the down cable. By connecting the down cable about 1 inch underneath the rest and the drawcord underneath the down cable, this makes for the perfect connection.
Adjusting for the Bullseye
Before you shoot the ball, and sure that you have the correct focus shot alteration. This may take a little fine-tuning on your part to get the right settings in place.
Bulge Check
Truthfully, this is the one part that archers hate. To check the bulge, you want to attach the drawcord to the bottom of the cable. Then, pull the bow to full strength. This will guarantee that the rest of the arrow rises completely and that the pulling cord is not drawing against the bottom cable. What you should find is that there is no lump in the downlink. It should look as if nothing is attached to it.
If you have done this correctly, when you down the bowstring you should find that the rest will start to drop very quickly. It might even be to your advantage to have a partner check to make sure that the arrow rest is looking and working correctly. This can be done by simply pulling back on the ball and having your partner examine the arm’s rest to make sure that it is upward and that your drawcord is taught but not so much so that it draws against your bottom cable. There is a real benefit by having someone assist you in this process.
Mounting the Rest
Once you have made sure that everything is properly positioned, it is now time to mount the rest directly to your ball. You want to make sure that you secure the jolts on the rest and the vertical squares so that they will not move. Make sure that you check the rest position once again so you have that football look and, if everything looks good, you should be ready to go.
How to tune drop away arrow rest?
Now there is one final thing to do. You want to check for leeway by using an analyzer FOB and change height. What you are going to find is that with most bows that you want a 1/8 or more leeway directly over the rest. Some will recommend as much as 3/16. What you may find is that you have to adjust the rest so that the arrow is over the focal point.
The important thing to understand is that by doing this you will not create problems with the tuning. Many archers do this, and have found that they have had no issues whatsoever.
Using Paper Tuning
This is one of the most common types of tuning because it’s incredibly reliable. You are able to verify that your rest, the nocking point, and the bowstring are perfectly adjusted. If you find this is the case, you will be shooting accurately every time.
Here’s How to Perform the Tuning
What you are looking to paper tune is your bow and some arrows. What you need is a case that can hold paper for you to shoot through. You should also get yourself a stopping board and be in some location where you can shoot arrows without worrying about causing damage or injuring someone.
The casing is used to grip the paper so that the paper does not bend while shooting through it. The edge should also be situated so that you can shoot over the paper. You can simply set this casing on a stand at about chest height. You should stay about 6 feet away from the target when shooting, then practice it 16 feet and then at 60.
What Are the Results?
If you have done this properly, you should shoot through the paper at exactly the same position every single time. This should include at the three different distances. If you find that you are not getting an accurate shot every single time, there are a few terms you need to know.
Nock Righ. For a right-handed person, you want to move the rest away from the arrow riser. For a left-handed person you should be closer to the arrow riser. If you are finding you have a tear, this could mean that the spine of your arrow is too solid. You may need to change your arrow and use a softer spine or you can expand the point load of your arrow.
Nock Left. For a right handed shooter, you want to push your rest toward the riser, while for a left-handed user you want to push it away. This shifting means that your arrow spine is too soft. Once again, you will need to change the arrow spine, choosing a more rigid one or decrease the amount of point weight on your arrow.
Nock High. For this, what you need to do is to move your rest up, or to move your nocking point down.
Nock Low. For this, move your rest down or move your nocking point up.
While this is not a complete guide to giving you all the information you will need to install and to in your guide, it should give you a clear starting point. What you are likely to find is that most drop away arrow rests will come with a detailed set of instructions, and may even have a video that will show you what you need to do.
However, this should give you a starting point to get underway. The important thing to take away from this article is to take your time and to make sure that you do things right. Failure to do so can mean you lose accuracy, making your purchase of a rest a complete waste of your money.


